Quick Guide: Change a Tire in Minutes
Getting a flat tire can turn a simple drive into a stressful moment. Knowing how to quickly change a tire can make it easier. It’s important for both new and experienced drivers to learn how to replace a tire.
Tire emergencies happen suddenly. How fast you act can affect your safety and the rest of your trip. Changing a tire can take 15 to 30 minutes for those with basic skills. Professionals can do it in about 10 minutes.
This guide will teach you how to handle unexpected tire problems. You’ll learn important techniques, safety steps, and ways to replace a tire efficiently. You’ll know what tools to use and how to change a tire smoothly.
Being prepared is essential. Learning how to quickly change a tire will help you face unexpected situations confidently. You’ll be able to handle tire emergencies on your own, saving money on roadside help.
Your safety is the most important thing when changing a tire. This guide makes complex steps easy to follow. These tips work for all kinds of vehicles, from small sedans to big SUVs.
Understanding the Basics of Tire Changes
Every driver should know the basics of tire changes. Unexpected tire issues can happen anywhere, anytime. Knowing how to handle these situations is key for road safety. It can save you time, money, and danger.
Tire problems can pop up unexpectedly, needing quick action. Spotting issues early can help you manage the change time better.
Common Reasons for Emergency Tire Changes
- Punctures from road debris
- Sidewall damage
- Slow air leaks
- Wear and tear
- Blowouts during high-speed driving
Essential Knowledge Before Starting
Being prepared is key to efficient tire changes. Know your vehicle’s needs, including:
- Spare tire location
- Jack placement points
- Recommended tire pressure
- Lug nut torque specifications
Safety First Approach
When changing a tire, safety comes first. Always ensure you’re in a stable, flat area away from traffic. Wear reflective clothes if near roads. Keep emergency warning triangles or flares ready to alert others.
Knowing these basics will make you more confident in handling tire changes. It helps you stay safe during unexpected roadside emergencies.
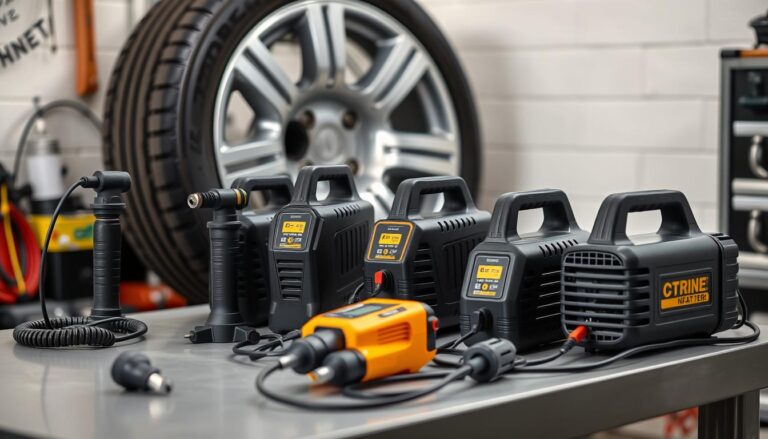
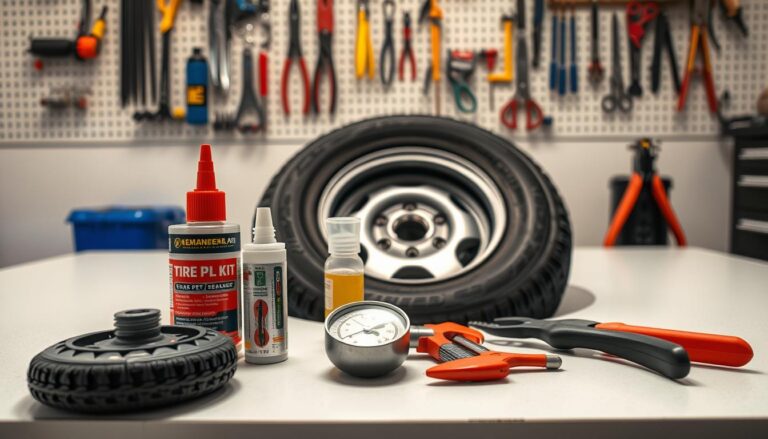
Required Tools and Equipment for Changing a Tire
Getting ready to change a tire means you need the right tools. This makes the process smoother and safer. The right equipment can turn a quick fix into a hassle-free experience.
Here are the must-haves for changing a tire:
- Spare tire (full-size or compact)
- Hydraulic or scissor jack
- Lug wrench
- Wheel wedges
- Flashlight
- Reflective safety triangles
- Work gloves
Choosing top-notch tools can cut down your average tire change time. It also boosts safety in emergencies.
| Tool | Purpose | Recommended Quality |
|---|---|---|
| Jack | Lifting vehicle | Vehicle-specific, weight-rated |
| Lug Wrench | Removing/tightening lug nuts | Chrome vanadium steel |
| Spare Tire | Replacement tire | Properly inflated, matching vehicle specs |
Pro tip: Always check and keep your tire change tools in good shape. Make sure tire pressure is right, the jack works well, and store tools where you can easily find them.
Investing in quality tools and knowing how to use them will prepare you for any unexpected tire changes. You’ll be able to handle them efficiently and safely.
Finding Your Vehicle’s Spare Tire Location
It’s important to know where your spare tire is. This can vary by car brand. Most cars have a special spot for the spare tire. It’s there to keep it safe and easy to get to when you need it.
The location of your spare tire depends on your car’s type and model. You can find it in a few common places:
- Underneath the vehicle’s trunk floor
- Mounted underneath the rear cargo area
- Inside SUV rear compartments
- Attached to the vehicle’s exterior (common in trucks and larger SUVs)
Different Spare Tire Types
Knowing about different spare tires is key. Car makers offer various types to meet different needs:
| Spare Tire Type | Characteristics | Typical Usage |
|---|---|---|
| Full-Size Spare | Matches original tire size and design | Larger vehicles, long-distance travel |
| Compact Spare | Smaller, temporary replacement | Passenger cars, limited distance driving |
| Run-Flat Tire | Reinforced sidewalls, can drive after puncture | Luxury vehicles, performance cars |
Accessing Emergency Tire Kit
Every car has an emergency kit for changing tires. This kit has the tools you need:
- Hydraulic jack
- Lug wrench
- Wheel wedges
- Spare tire
- Protective gloves
Get to know where your spare tire and emergency kit are. Being prepared helps a lot in emergency situations.
Proper Vehicle Positioning and Safety Measures
Getting ready for a tire change means placing your vehicle in the right spot. This ensures safety and makes the process faster. The right spot can prevent accidents and make the job easier.
Finding the best place to change a tire is key. Look for these important features:
- Flat, solid ground with minimal slope
- Hard surface like concrete or asphalt
- Away from traffic and possible dangers
- Well-lit area for nighttime changes
Keeping safe is the top priority when changing a tire. Follow these steps to protect yourself and others:
- Turn on hazard lights right away
- Make sure the parking brake is fully on
- Use wheel chocks on opposite wheels
- Set up reflective warning triangles
Your preparation greatly affects how fast you can change a tire. Proper positioning reduces risks and makes the process faster and safer.
| Safety Measure | Purpose | Recommended Action |
|---|---|---|
| Hazard Lights | Alert other drivers | Turn on immediately |
| Parking Brake | Prevent vehicle movement | Fully engage before lifting |
| Wheel Chocks | Stabilize vehicle | Place on opposite wheels |
By using these strategies for positioning and safety, you’ll have a safe place to change your tire quickly and with confidence.
How Long Does it Take to Change a Tire
Changing a tire is a vital skill for drivers. The time it takes can vary based on several factors. It’s important to know what affects the duration of this task.
On average, changing a tire takes 15 to 45 minutes for most people. Professionals can do it in under 10 minutes.
Factors Affecting Tire Change Duration
Several things can change how long it takes to change a tire:
- Experience level: Beginners might take up to an hour
- Weather conditions (cold or rainy weather slows things down)
- Vehicle type and how easy it is to get to the tire
- Tools and preparation available
Professional vs DIY Time Comparison
Changing a tire yourself versus having a pro do it can make a big difference. Here’s a quick comparison:
| Type of Tire Change | Average Time | Skill Level Required |
|---|---|---|
| Professional Mechanic | 5-10 minutes | Expert |
| Experienced DIY | 15-25 minutes | Intermediate |
| First-Time DIY | 30-45 minutes | Beginner |
Getting better at changing tires and being prepared can save a lot of time. Keeping your spare tire and tools ready can make the swap much quicker.
Loosening Lug Nuts: Proper Technique

When you need to replace a tire, knowing how to loosen lug nuts is key. This step is important for a safe and quick tire change.
Before you lift your vehicle, get the lug nuts ready for removal. Mechanics suggest a special method to make the process easier.
- Position the lug wrench at a 90-degree angle to the wheel
- Apply downward pressure using your body weight
- Turn the wrench counterclockwise to loosen
- Use steady, controlled movements
The goal is not to remove the lug nuts completely yet. You want to loosen them enough so they’re easy to remove when the car is up.
| Lug Nut Loosening Technique | Recommended Action |
|---|---|
| Initial Positioning | Ensure wrench is straight and aligned |
| Pressure Application | Use body weight, not just arm strength |
| Turning Direction | Counterclockwise, one half-turn at a time |
| Lug Nut Removal | Partially loosen, complete removal after lifting |
If lug nuts are hard to turn, try using penetrating oil or a breaker bar. Remember, being patient and using the right technique is important when replacing a tire.
Positioning the Jack Under Your Vehicle
Changing a tire needs careful jack placement for safety. The jack is key in supporting your vehicle’s weight while you swap out a flat tire. Knowing where to place it is vital to avoid accidents or harm to your car.
Before lifting your car, find the right jack points. These are strong areas made for safely holding the car’s weight. Car makers often mark these spots with notches or symbols near the frame.
Identifying Jack Points
- Check your vehicle’s owner manual for exact jack point locations
- Look for reinforced metal sections along the vehicle’s frame
- Avoid placing the jack on plastic components or non-structural areas
- Inspect the jack point for rust or damage before use
Safe Lifting Procedures
The time it takes to change a tire depends on how well you place the jack. Follow these important steps for a safe lift:
- Park on a flat, stable surface
- Engage the parking brake
- Place wheel chocks around the opposite wheel
- Position the jack precisely at the designated jack point
- Raise the vehicle slowly and steadily
Pro tip: Always use a jack stand for additional safety when working underneath the vehicle.
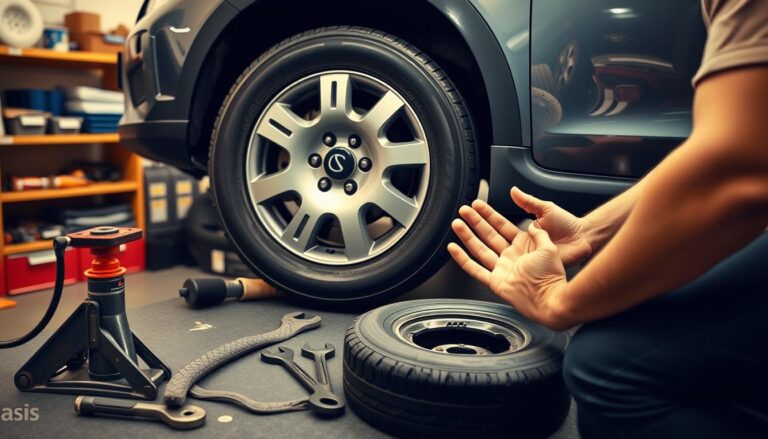
Removing the Flat Tire Safely

When you need to change a tire fast, safety is key. Make sure the car is lifted and steady before you start. This is the first step to a safe tire change.
To remove the flat tire right, follow these steps:
- Loosen all lug nuts before lifting the car
- Wear gloves to protect your hands
- Check the tire for wear or damage
- Keep the flat tire nearby for inspection or emergencies
Changing a tire quickly can face challenges. Rust or corrosion can make it hard to remove the tire. If it’s stuck, try rocking it gently or use a rubber mallet.
Where you place the flat tire matters. Put it on its side near the car but not under it. This keeps it from rolling and gives you room to work.
Important safety tips for removing the tire include:
- Wear work gloves to protect your hands
- Keep the area clean and organized
- Remove lug nuts one by one
- Stay balanced while taking off the tire
Changing a tire quickly and safely needs a careful plan. Take your time and focus on each step. This way, you avoid accidents and damage to your car.
Installing the Spare Tire Correctly
Learning to change a tire quickly means paying close attention to how you put on the spare. It’s all about safety and keeping your car running right. Getting it right helps you stay in control and avoid trouble on the side of the road.
First, check the wheel hub for dirt or rust. Clean it off so the spare fits well. A clean, tight connection is key for a smooth tire change.
Alignment Strategies for Optimal Placement
- Align wheel studs precisely with hub mounting holes
- Ensure the tire faces the correct direction
- Center the spare tire carefully on the wheel hub
- Check for smooth, even contact with mounting surface
Securing the Spare Tire Effectively
Start by tightening the lug nuts by hand. This helps avoid cross-threading and keeps things straight. Use a bit of force to start each nut, moving them in a star or crisscross pattern.
| Securing Step | Key Action | Recommended Technique |
|---|---|---|
| Initial Placement | Hand-thread lug nuts | Gentle, even pressure |
| Alignment Check | Verify wheel positioning | Ensure full contact with hub |
| Preliminary Tightening | Partially tighten nuts | Use crisscross pattern |
Pro tip: Never fully tighten lug nuts while the vehicle is lifted. Complete final tightening after lowering the car to ground level for maximum tire change efficiency.
Proper Lug Nut Tightening Sequence

Tightening lug nuts during a tire change is all about precision. It’s key to ensure your vehicle’s safety. The speed and accuracy of your tire change affect your wheel’s stability and performance.
Experts say to use a star or cross-pattern sequence for tightening lug nuts. This ensures even pressure on the wheel. It helps prevent damage or uneven wear.
- Start by hand-tightening lug nuts in a star pattern
- Use a torque wrench for precise tightening
- Follow your vehicle manufacturer’s recommended torque specifications
The star pattern means tightening nuts in an alternating sequence, like a star. Skipping this method can lead to wheel misalignment and safety risks.
When using a torque wrench, apply pressure slowly to reach the right tightness. Don’t over-tighten, as it can damage wheel studs. Also, avoid under-tightening, as it might make wheels loose while driving.
- First, tighten nuts by hand
- Use torque wrench in star pattern
- Check tightness in a final cross-pattern sweep
Proper tire change speed and technique are vital for your vehicle’s safety and performance. Always check your vehicle’s manual for specific tightening instructions and torque specs.
Lowering the Vehicle and Final Checks
After changing your tire, it’s important to finish the job right. This ensures your safety and the correct installation of the spare tire. These final checks help avoid road hazards.
Lowering your vehicle needs careful steps and checks. It’s all about making sure the tire is installed securely. Drivers must follow these steps closely.
Testing Tire Security
Here’s what to do when lowering the vehicle:
- Slowly lower the jack until the spare tire touches the ground
- Remove the jack completely from underneath the vehicle
- Apply slight weight to verify tire stability
- Check for any unusual tilting or uneven positioning
Post-Change Inspection Checklist
Do a thorough check after changing the tire:
- Verify spare tire pressure using a reliable gauge
- Confirm all lug nuts are tightened to manufacturer specifications
- Check that tools are returned to their designated storage area
- Inspect the changed tire for any visible damage
| Inspection Item | Action Required | Recommended Frequency |
|---|---|---|
| Tire Pressure | Check with pressure gauge | Immediately after change |
| Lug Nut Torque | Verify proper tightness | Immediately and after 50 miles |
| Spare Tire Condition | Visual inspection | During and after installation |
Pro Tip: Recheck lug nuts after driving about 50 miles to ensure they stay tight during your trip.
Maximum Speed and Distance Limitations with Spare Tire

When you face a tire change emergency, knowing your spare tire’s limits is key. Spare tires are not made for long drives or high speeds.
Every spare tire has its own speed and distance limits. Drivers must follow these rules:
- Maximum recommended speed: 50 miles per hour
- Maximum driving distance: 50-70 miles
- Recommended time before replacement: Within 1 week
Different spare tires have different rules. Compact spares, also called “donuts,” have stricter rules than full-size spares.
| Spare Tire Type | Max Speed | Max Distance |
|---|---|---|
| Compact Spare | 50 mph | 50 miles |
| Full-Size Spare | 65 mph | 100 miles |
Driving too fast or too far can cause tire failure and damage your car. Find a professional tire service as soon as you can after using a spare tire.
Check your car’s manual for specific spare tire advice. Different cars have different rules.
When to Seek Professional Help
Changing a tire can be tough. Knowing how long it takes doesn’t mean you should do it yourself. Some situations need a pro to keep you safe and your car in good shape.
There are times when calling for roadside help is the best choice. Knowing when can avoid risks and costly errors during a tire change.
- Unsafe roadside locations with heavy traffic
- Extreme weather conditions like heavy rain or snow
- Physical limitations preventing safe tire changing
- Complex tire damage requiring specialized tools
- Lack of proper equipment or spare tire
Professional mechanics can change a tire faster and safer than you. They know how to handle different tough conditions.
If you’re in a tough spot, put safety first. Call roadside assistance or a local tire service pro. They can quickly and well replace your tire.
- Keep emergency contact numbers handy
- Have a charged mobile phone
- Keep your vehicle’s insurance roadside assistance details ready
While learning to change a tire is good, knowing when to ask for help is key. It’s for your safety and keeping your car in top shape.
Common Mistakes to Avoid During Tire Changes
Changing a tire might seem easy, but many drivers make big mistakes. These mistakes can make the process unsafe and take longer. Knowing these common errors can help you change a tire more efficiently and safely.
Both experienced and new drivers can fall into traps during a tire change. It’s important to know these dangers to keep your vehicle safe and change the tire quickly.
Critical Prevention Tips
- Always engage the parking brake before starting the tire change process
- Place wheel wedges on both sides of the tire to prevent vehicle movement
- Check ground stability before positioning the jack
- Wear protective gloves to prevent hand injuries
Safety Errors to Watch For
| Potential Error | Potential Consequence | Prevention Strategy |
|---|---|---|
| Incorrect jack placement | Vehicle instability | Consult vehicle manual for precise jack points |
| Uneven lug nut tightening | Wheel misalignment | Use cross-pattern tightening technique |
| Inadequate tire pressure | Reduced spare tire performance | Check spare tire pressure before installation |
It’s important to stay focused during a tire change. Rushing or getting distracted can lead to dangerous mistakes. Always take your time and follow each step carefully for a successful tire change.
By knowing these common errors, you can lower risks and make tire changes faster. Remember, practice and preparation are key to a smooth and safe tire replacement experience.
Maintaining Your Spare Tire and Tools
It’s vital to keep your spare tire and tools in good shape for emergencies. Regular upkeep means you’re ready when a flat tire happens.
Checking your spare tire often is key. Make sure to check the tire pressure every three months, even if it’s not used. A well-kept spare tire can save you in unexpected situations.
- Inspect tire pressure quarterly
- Check for any visible damage or wear
- Rotate full-size spare tires periodically
- Store in a cool, dry location
Your tire-changing tools need careful care too. Lubricate the jack’s moving parts and keep the lug wrench clean and rust-free. Store these in a special kit in your car.
For full-size spares, rotate them like your regular tires. This keeps them evenly worn and lasts longer. Being ready for a spare means having one that works when you need it.
Make a checklist for your spare tire and tools. This simple habit can avoid problems during roadside changes.
Regular Tire Maintenance to Prevent Flats
Preventing flat tires starts with proactive maintenance. Knowing how long it takes to change a tire and regular care can make your tires last longer. It also keeps your vehicle safe.
Proper tire maintenance involves several critical steps. These steps help drivers avoid unexpected tire problems:
- Check tire pressure monthly
- Rotate tires every 5,000-7,500 miles
- Inspect tire treads for wear patterns
- Balance wheels periodically
- Align wheels when recommended
Tire pressure is key in preventing flats. Underinflated or overinflated tires can lead to uneven wear. This shortens the tire’s life and raises the risk of sudden failure. Always use a reliable tire pressure gauge to keep the PSI at the recommended level in your vehicle’s manual.
Regular visual inspections can catch issues early. Look for:
- Visible punctures or embedded objects
- Sidewall damage
- Uneven tread wear
- Bulges or blisters
Professional tire maintenance services can offer detailed assessments. They help extend your tires’ performance and safety.
Conclusion
Changing a tire might seem tough, but it’s doable with the right knowledge. It’s not just about being fast. It’s about knowing how to do it safely and being ready for anything.
We’ve shown you how to replace a tire step by step. From picking the right tools to making sure your car is in the right spot, we’ve got you covered. Practice these steps to get better and feel more confident.
Keeping your tires in good shape and being prepared can prevent unexpected problems. Check your spare tire often and know what your car needs. Having the right tools ready can help a lot when you get a flat tire.
Learning how to change a tire is more than just a skill. It’s about staying safe, avoiding delays, and feeling calm while driving. Stay informed, be ready, and drive with confidence.